(1).jpg)
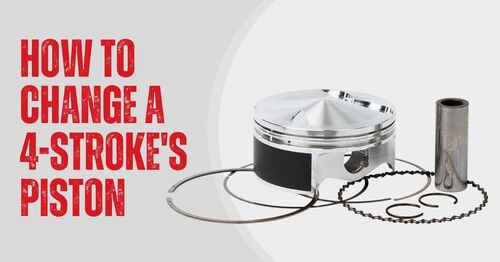
HOW-TO: CHANGE A FOUR-STROKE’S PISTON
This article originally appeared in Transmoto’s 2013 October Issue (#36).
Pistons, rings and barrels are consumable parts in high-tech four-strokes – no matter how well you treat them, they’ll wear out. Manufacturers generally recommend that you change your bike’s piston every 40 to 80 hours. However, plenty of owners get away with over 150 hours without a rebuild on a 450cc. On the other hand, a fist-full of sand or a stray piece of metal can leave the inside of your engine looking like a priceless Picasso artwork that’s been attacked with 40-grit sandpaper. And a knife!
So, if you’re an average rider, it’s a good idea to pull the head and barrel off your bike once every couple of years and inspect the condition of the piston and bore. At the very least, throwing in a new set of rings and inspecting the condition of the wearing parts is cheap insurance against a seizure or a thrown bearing. Given the complexity of a modern four-stroke, there are plenty of owners who couldn’t describe what the inside of their engine looks like – let alone how to rebuild it. Replacing a piston shouldn’t be undertaken by someone with limited mechanical experience, but it isn’t the hardest job, either.
The purpose of this story is two-fold: to give those who send their bike to a mechanic an idea of what’s involved in the process, and to arm those competent home mechanics with the skills and tips needed to get the job done properly. Nick Dole explains how it’s done.
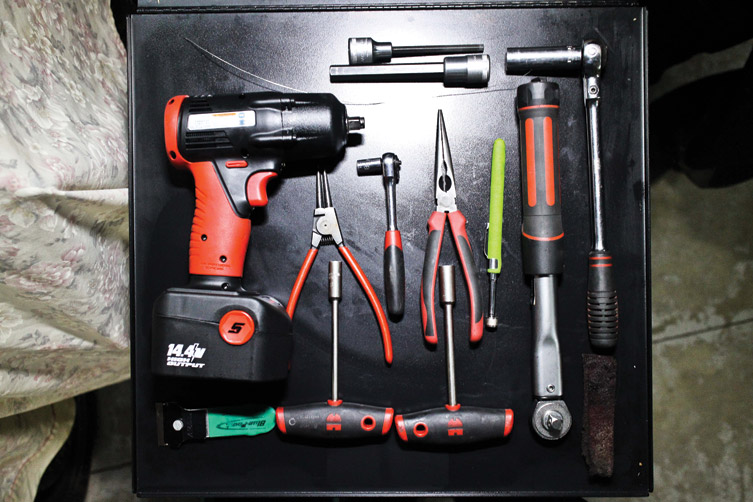
TOOLS YOU’LL NEED
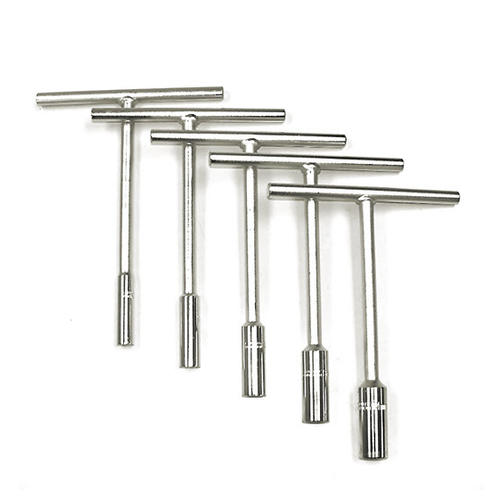
- Spanners, T-Bars & socket set
- Allen keys
- Tie wire
- Pliers
- Magnet
- Vernier calipers
- Circlip pliers
- Impact gun
- Stanley knife
- Torque wrench
WHAT IT’LL COST YA
- Labour: 2 to 4 hours
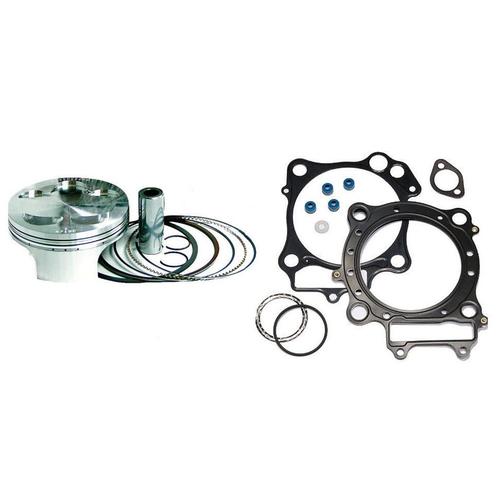
- Piston & Rings: $120 to $250
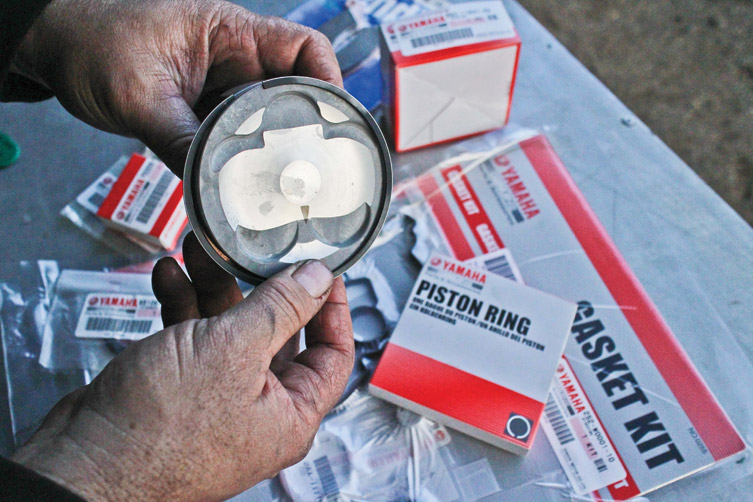
- Gasket Kit: $100
1. REMOVE THE VALVE TRAIN
This story kicks off with the valve train, buckets and shims removed. This was covered in the last feature, so if you missed it, click here and follow the steps through to that point. Make sure that your bike is clean and that you’ve measured and taken notes of all the buckets and shims you’ve removed. Without notes, you won’t know which shims and buckets belong to what valve when putting it all back together.
2. DRAIN THE COOLANT
Taking the barrel off requires a radiator hose to be removed, so you’ll need to drain the coolant from your bike. This can provide a convenient time to do a cooling system flush while you’re at it. To remove the coolant, remove the radiator cap, then take out the drain bolt on the water-pump cover – it’s the one with a copper washer. With the coolant drained fully, take off the top radiator hose.

3. REMOVE THE EXHAUST
Accessing the head and barrel requires the exhaust to come off, too. Before you even start to unbolt anything, give all the bolts a thorough spray with penetrating oil and leave it for ten minutes, as the engine’s heat is almost guaranteed to have stiffened the bolts up. Then unbolt the muffler and header pipe.
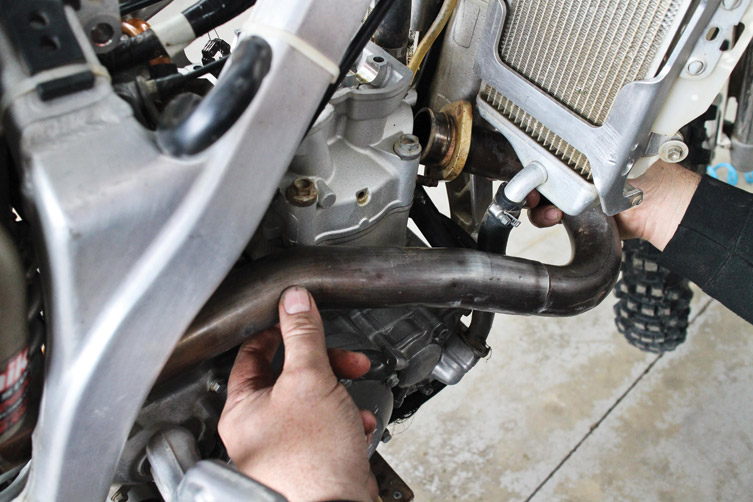
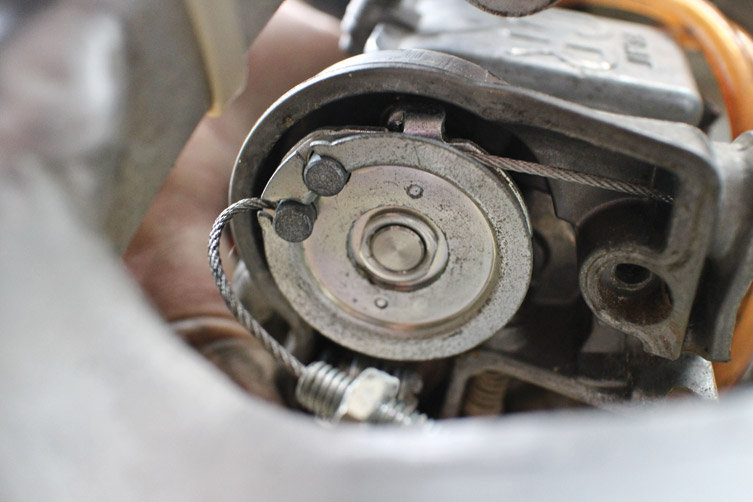
4. REMOVE THE CARBURETOR OR THROTTLE BODY
As well as the exhaust and top radiator hose, you will also need to remove the carby, or throttle body (if your bike is fuel-injected). This means removing the throttle cable(s) from the throttle cam, then pushing the carby or throttle body away from the inlet rubber on the head. It’s often easiest to pull the subframe off, giving you room to move when taking the head and barrel out later.
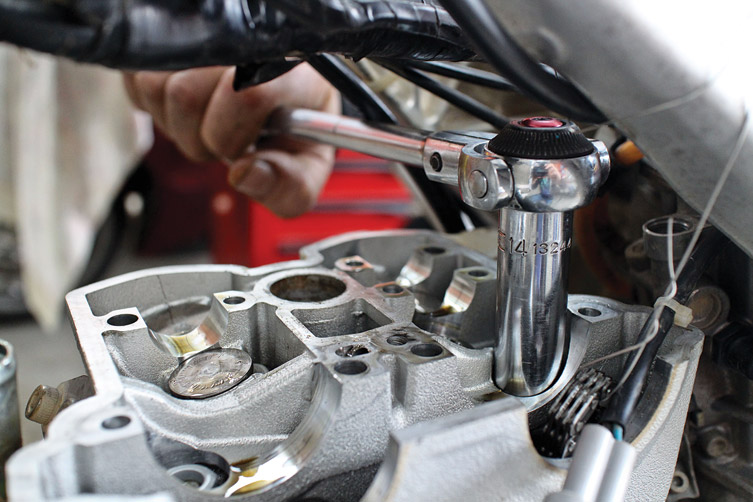
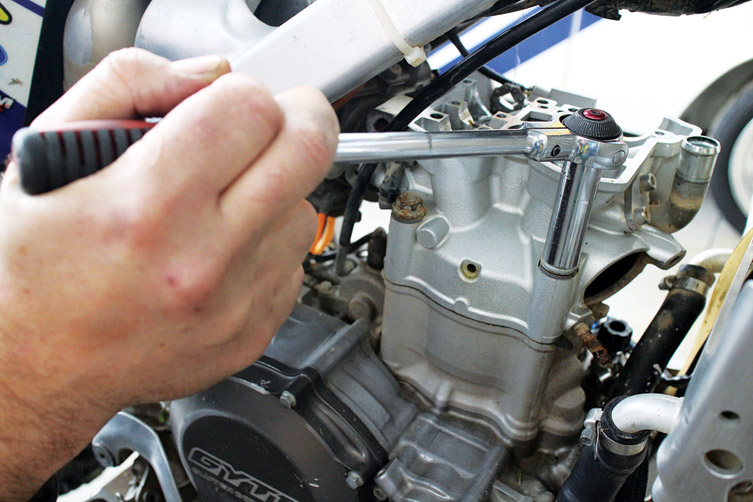
5. LOOSEN THE HEAD BOLTS
With the valve train removed and the timing chain secured up to the frame with a piece of tie-wire, loosen then remove the head bolts. There are typically four bolts that sit under the valve train. On some bikes, those clever engineers spectacularly fail to think about whether the bolts can be removed from the engine when it’s still in the frame, so you may need to loosen the engine mounts on your bike to allow enough movement get the bolts out.
6. LEVER THE HEAD LOOSE
If the head gasket has done its job properly, the sealant that is pre-impregnated into the gasket will have stuck the barrel and the head together. To lift the head off you’ll need to pry the head up at different points to lift it up from the dowel pins holding it in place. There are usually two prying points on either side of the head to work off. Don’t try and jam a flat-blade screw driver down the gap as you’re sure to damage the mating surfaces.
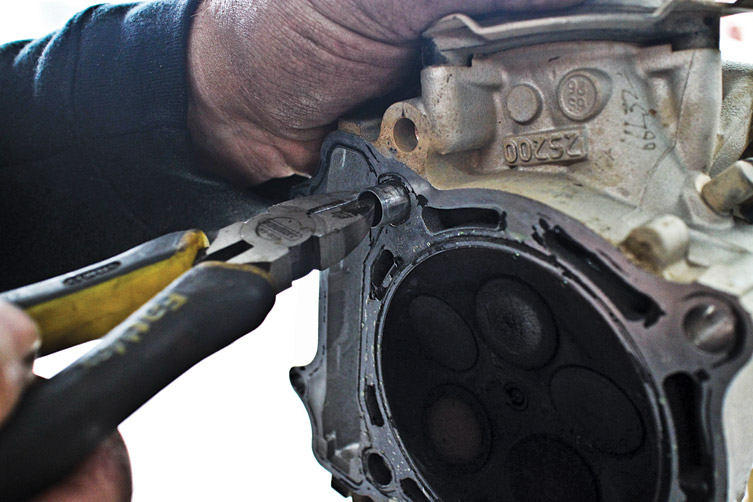
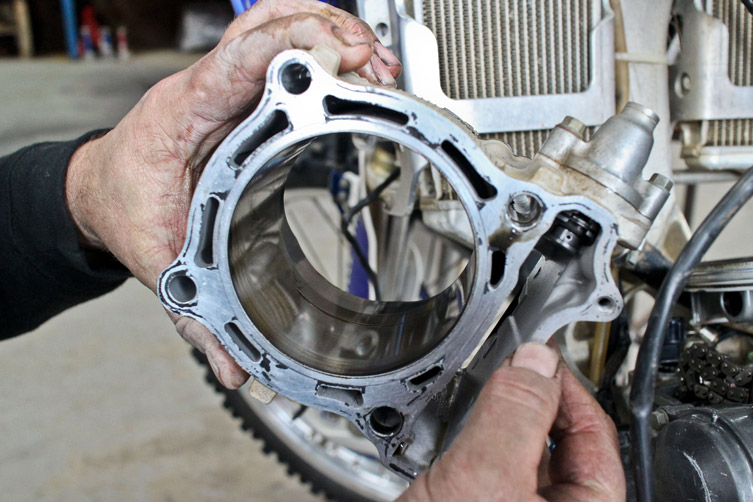
7. REMOVE DOWEL PINS
Holding the head in alignment to the barrel are four dowel pins. In order to clean the gasket surface, you’ll need to remove these dowels from the head and bore. The best way to do this is using a pair of side-cutter pliers. This will only leave a tiny score on the surface of the dowels and will prevent you from squashing or deforming them, rendering them unusable. Also, it’s worth noting what you see on the head. You can tell from the soot covering the head and valves that the bike has been running too rich.
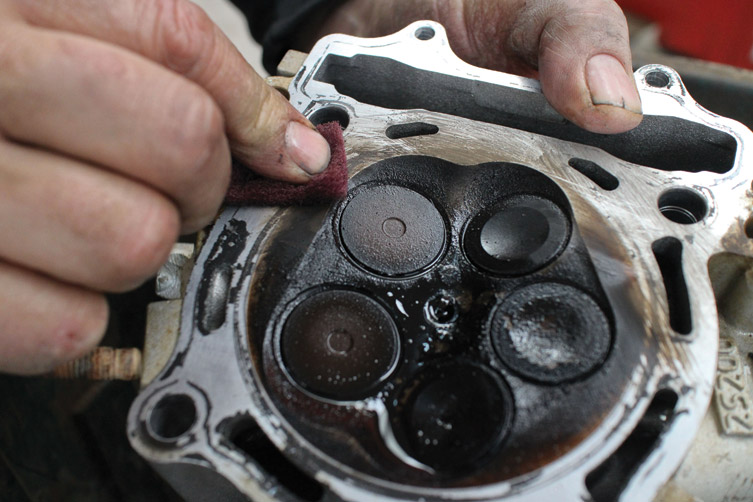
8. CLEANING THE HEAD
With the head off the bike, now is the perfect time to clean away any built-up grime, soot and gasket remains. Simply cover the head in degreaser, then use a Scotch-Brite pad (we buy it in 20m rolls from a panel beater supply shop) to clean the surface of the head. There’s no need to go to wild here as you don’t want to scratch the head or gasket surface, but make sure all the old gasket glue is completely removed.

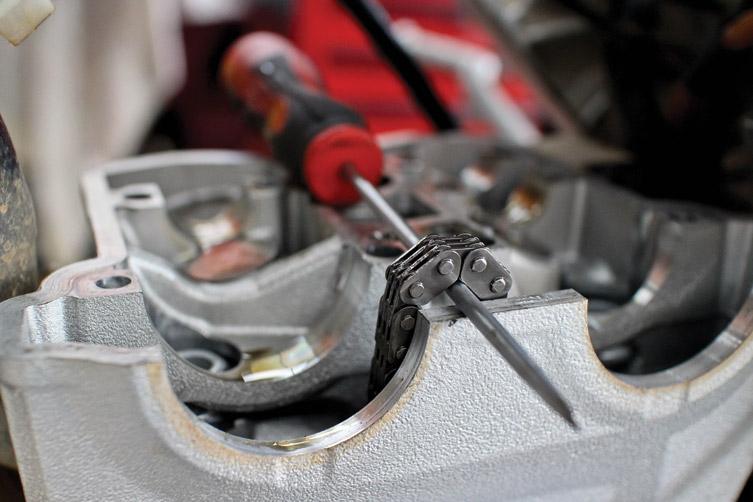
9. REMOVE THE TIMING CHAIN SLIDER
Before removing the barrel, you’ll need to pull out the plastic timing chain slider. This almost always sits at the front of the engine, and can simply be pulled out. The slider has two lugs formed into the plastic that nestle into a groove on the top of the barrel, thus ensuring the slider stays put. When re-installing the slider later, make sure that the tip of the slider and the lugs are properly aligned. In the timing chain replacement story next month, you’ll see where the base of the slider sits in the cases.
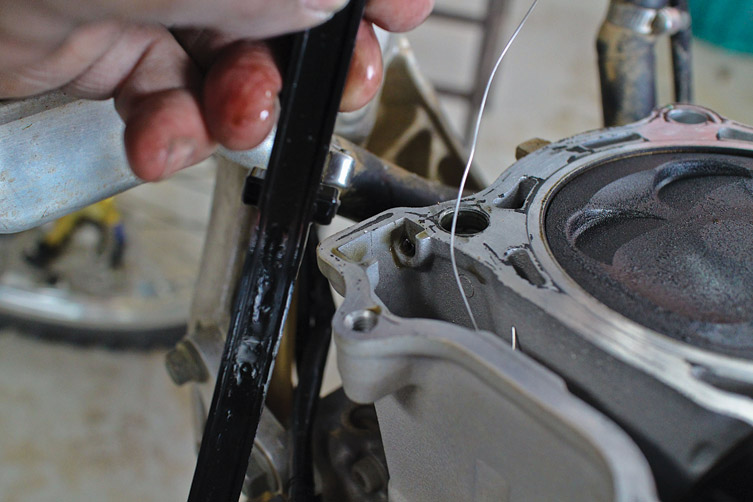
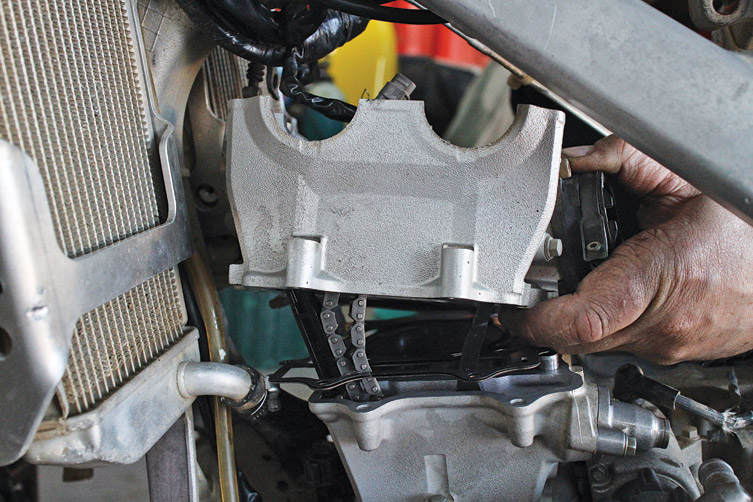
10. REMOVING THE BARREL
With the timing chain slider removed, the only thing getting in the way of the barrel’s removal is the timing chain. A long piece of tie wire twisted around the timing chain allows you to simply let the chain drop down into the engine cases and be easily retrieved later. Then pry the barrel from the cases and pull the barrel over the piston. You may need to rotate the engine (via the crank nut) to get the piston lower in its stroke if you have limited removal room in the frame. Clean the gasket surface in the same way that you did with the head.
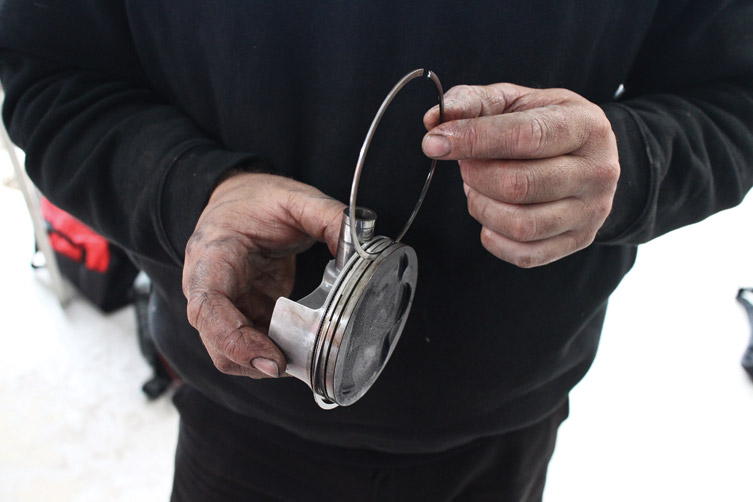
11. REMOVING THE PISTON
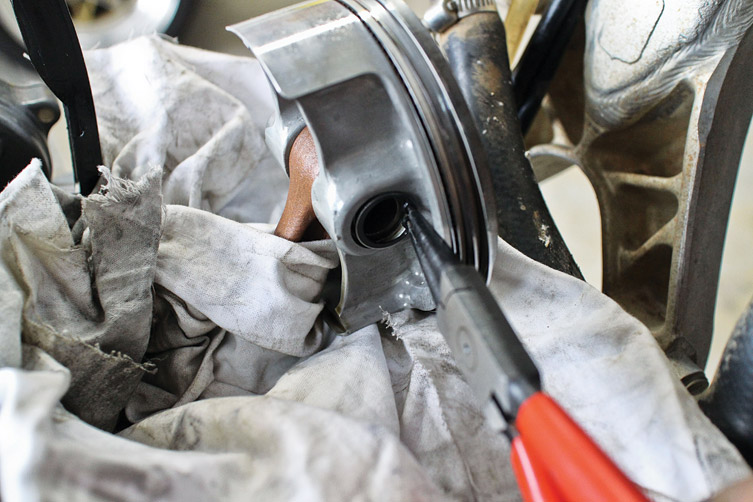
The final step in the disassembly process is removing the piston. This is an easy step, but can lead to a world of pain if you lose a circlip down into the engine cases. To avoid this, grab a clean rag and wrap it tightly around the conrod then fanning out over the gasket surfaces, so that anything dropped will land on the rag. Use a pair of circlip pliers to remove the circlip out from one side of the piston and the end of the gudgeon pin. Then push the gudgeon pin out to remove the piston from the conrod.
12. OIL UP THE NEW RINGS
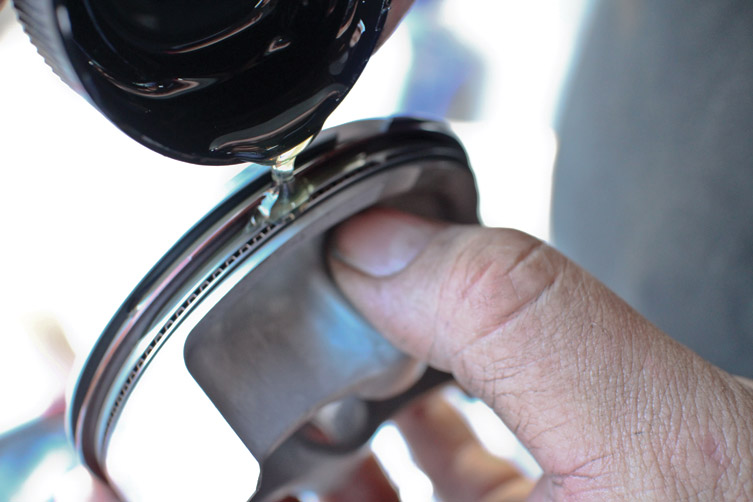
After you’ve inspected the piston, rings and bore and set up the new rings on the piston you’re going to use (see the sidebars on those steps), pour some heavy oil on the rings and distribute it around the piston. This provides some lubrication for when you first start up the bike after the rebuild and prevents any initial scouring.
13. INSTALL THE PISTON INTO THE BARREL
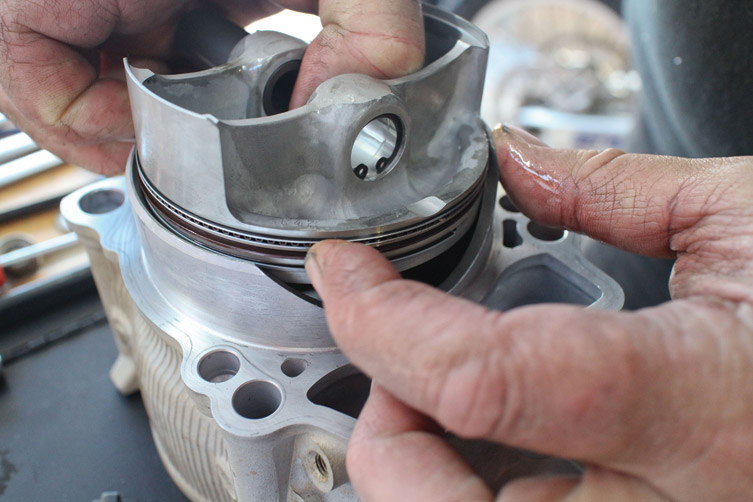
When reinstalling the piston and barrel on the bike, it is possible to install the piston first then place the barrel over the top, however this can be a fiddly process. The best method is to partly install the piston into the barrel on the workbench, where you can easily pinch the rings together and ensure they’re lined up correctly. While you’re there, install a circlip on one side of the piston to make life easier when you’re putting the gudgeon pin through the conrod in the next step.
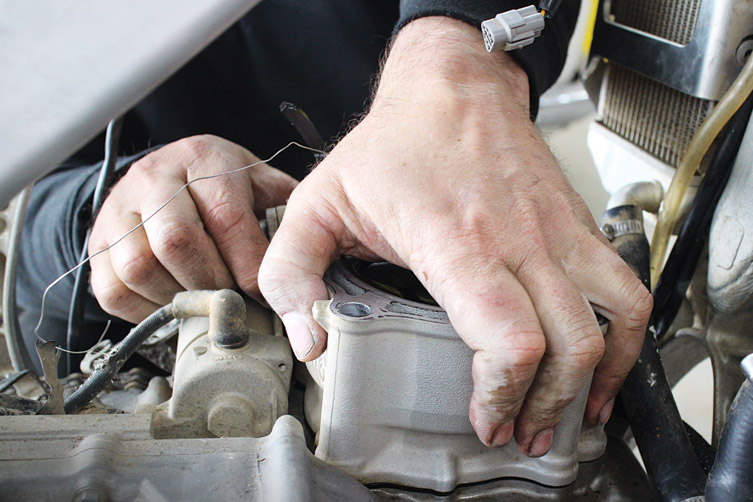
14. REINSTALL THE NEW PISTON & BARREL
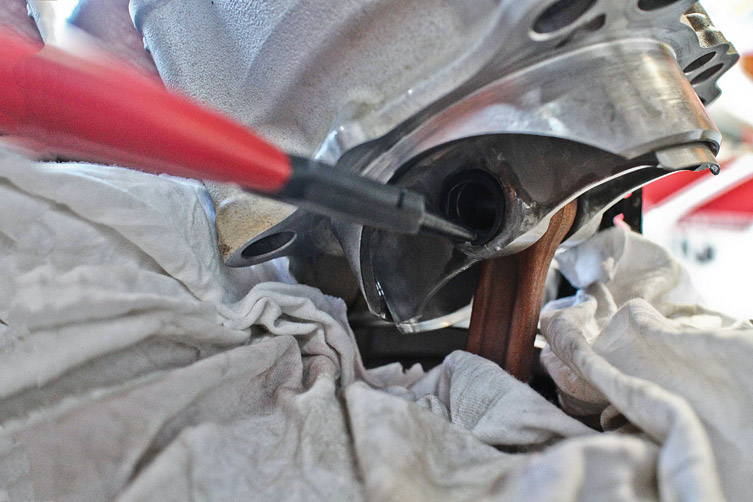
Before you go putting the piston on, make sure the gasket surface on the cases is clean and that you’ve laid a base gasket out on the surface and over the conrod. Always use a new top-end gasket kit – the genuine Yamaha kit we used costs $100. Then grab the barrel with the piston already in place. Slip the gudgeon pin through the piston and conrod, then insert the second circlip, making sure it’s firmly in its slot. An important trick here is to ensure that the eyes of the circlip are facing either directly up or down in the slot, in line with the direction of travel of the piston. If the circlip gap is placed at three or nine o’clock (when viewed from the side), the G-force the circlip is subject to when the piston changes direction at the end of the stroke could cause the weight of the circlip to push against its own spring tension and come out of place.
15. REINSTALL THE HEAD
With the barrel secured and the timing chain slider reinstalled, place the dowels into the top of the barrel to align the head. With the gasket surface clean, seat the new gasket into position, then place the head onto the cylinder. Using the wire connected to the timing chain, pull the chain up through the head and tie it up to the frame of the bike. Push the head down onto the dowels and ensure the gasket is seated well, then check that the timing chain slider remains seated.
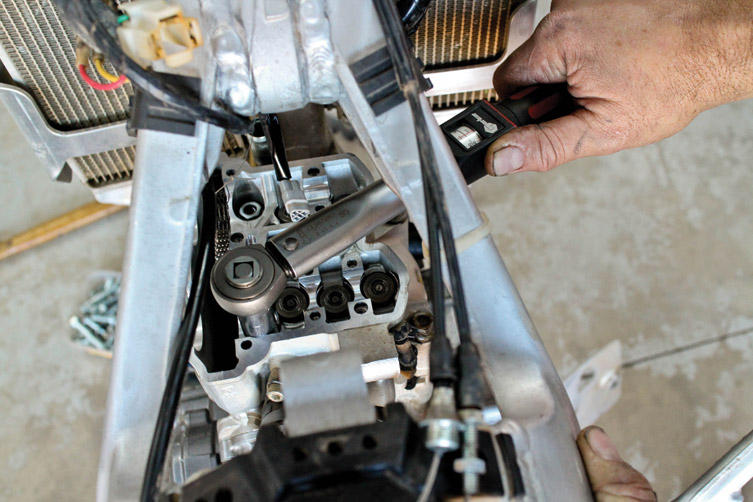
16. ADJUST THE HEAD TENSION
With the head in place, bolt the head and barrel to the cases. Of all the bolts on your bike where it is important to get the correct tension, the head bolts are probably the most crucial, so use a torque wrench. If you’re re-using the head bolts, they have already been stretched once, so use plenty of caution and try to ‘feel’ the bolt stretch. To remove any unwanted friction, use a dab of copper anti-seize grease on the thread and under the bolt head.
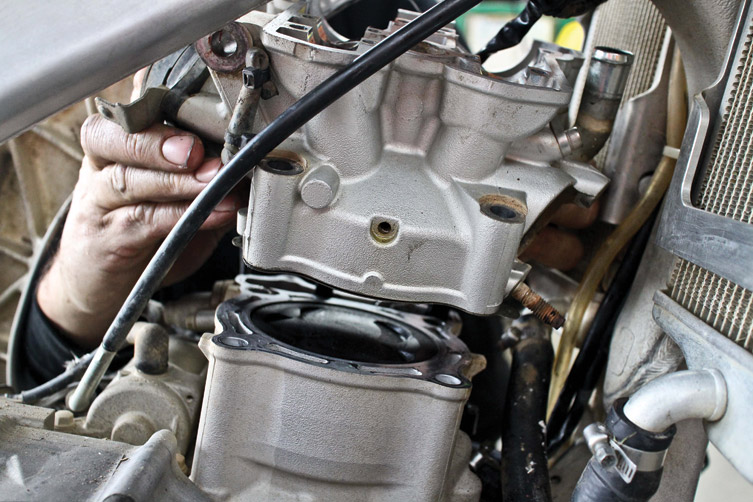
17. REINSTALL
With the head and barrel back in place and correctly torqued, reinstall the exhaust, carby or throttle body, and radiator hoses. Then follow the steps in the valve adjustment story to put the valve train back together and reinstall the timing chain, and then fill the cooling system with fluid. Put the top engine mounts back on, reinstall the throttle cables and put the tank and plastics back together, and you should be good to go.
TIPS FOR INSPECTING THE BORE
Most modern four-stroke barrels are made of aluminium with a Nikasil plating on the bore. Although the Nikasil coating is tough enough to withstand a beating from the piston rings, it is also relatively thin, and will wear down over time. If you have a cylinder bore gauge micrometer, measure the diameter of the bore up and down the length of the stroke and at several points around the circle of the cylinder, and compare the measurements with the manufacturer’s specifications. If not, you can get a good idea of the wear on the bore through a close visual inspection. Look for any deep scours in the bore and run your finger lightly around the cylinder to feel for any inconsistencies or scratches. This bore has about 150 hours on it and doesn’t have any major markings, however the bore was getting close the wearing through the Nikasil to the aluminium in some points. We decided to re-use the barrel to get another 50 hours from it, however a safer bet would be to replace the barrel or get it re-plated. If you re-use the barrel, either give it a quick hone using a honing tool or a very light rub with a Scotch-Brite pad to remove any glazing on the cylinder.
TIPS FOR INSPECTING THE PISTON & RINGS
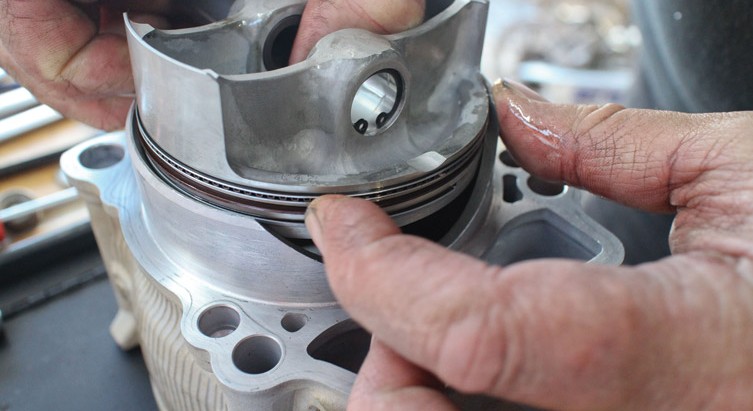
Aside from checking for obvious wear, scrapes or gouges on the piston, the most important inspection is to check the wear on the rings and piston’s grooves. To do this, take the rings off the piston. Then check each ring in turn to see how far the ring can turn in the groove when held in the same way as the above photo. If it can move back and forth more than about 10 degrees, it’s a fair bet that the rings and grooves are worn out, and that a new piston and rings are called for. Also, pay close attention for any signs of wear on the gudgeon pin, which could become exacerbated with use. There are plenty of aftermarket options for pistons and rings, but the genuine Yamaha items we used are of the highest quality and aren’t too expensive – the piston, gudgeon pin and rings cost around $250 all up.
TIPS FOR SETTING THE PISTON’S RINGS
When putting the rings on the piston, it’s important to place the ring gaps at certain intervals around the bore to ensure you get as much compression as possible. Sure, they might rotate a little over time, but you should get the intervals between each ring right in relation to the others to reduce the chance of all the gaps lining up and you losing serious compression. Most manufacturers recommend to place all ring gaps 120 degrees away from each other. That is fine, however a lot of engine builders use a different approach. Imagine that the front of the piston is 12 o’clock. They place the top compression ring gap at 3 o’clock, the second compression ring gap at 9, the top oil ring gap at 3, the oil scraper gap at 12, and the bottom oil ring gap at 9 o’clock.