(1).jpg)
How to Install New Valves on a 4-Stroke Dirt Bike
Modern dirt bikes have come a long way over the past few years, but so has the maintenance requirements as well. In this article, we're going to focus on how to install a new valve kit to your four-stroke dirt bike.
In the below guide you will find 3 Steps that we’ve prepared to help you install your new valves correctly.
- Pre-installation
- Installation
- Post-installation

Building a 4-stroke head can seem like a daunting task, but understanding how to take each step can greatly lower intimidation.
1. Pre-Installation
The lifespan of your new valves will depend on two important parts: the valve guides and the valve seats.
Valve Guides
Like what its name says, it's a valve guide. Its function is to guide the position of the valve to ensure that it's ccontrolled as it goes up and down. The point of contact between the face of the valve and the seat should be the same location, for good engine performance and valve longevity.
.jpg)
Valve guides are the passages the valves operate through, allowing the valve stem to lead from the combustion chamber and through the valve, without losing pressure thanks to the valve seals.
You'll notice an engine is wearing when the valve guides start to turn into an hourglass shape. When you measure the worn valve guides from the top to the bottom, it will usually show a slightly larger diameter at the top and bottom than in the middle. Once this happens, the chances of the valve face contacting a much broader area of the valve seat will increase, which will increase the seat and valve face wear rate.
Pro tip: You must measure your valve guides before you put your new valves.The service limits for the valve guide bore and the specs & instructions for your specific engine can be found in the manual, so be sure to check that too.
Valve Seats
If you've seen a circular ring made of bronze or steel, that is the valve seat. Its role is to support and seal the valve when it closes, cool the valve, and resist wear and recession. The valve seats undergo different ways of stress such as thermal stress, frictional stress, impact stress.
.jpg)
Valve seats are the chamferred rings around the openings in the combustion chamber. These must be consistent and smooth for valves to seal properly. This used head will get the valve seats recut by a reputable shop before new valves are installed.
As the engine runs, the valve seat will wear together with the valve face. That's why it's best to have your valve seats recut before you install your new valves to make sure they're properly matched together. If you install a new valve with a worn seat, the new valve face will likely wear out much faster.
Pro tip: You can visit your reputable shop and have them recut the valve seats (and valve guides, as needed). This process will need a high level of accuracy to ensure concentric valve seats and guides, so it's best to go to a shop equipped with specialised seat cutting machines, compared to the hand-operated seat cutter.
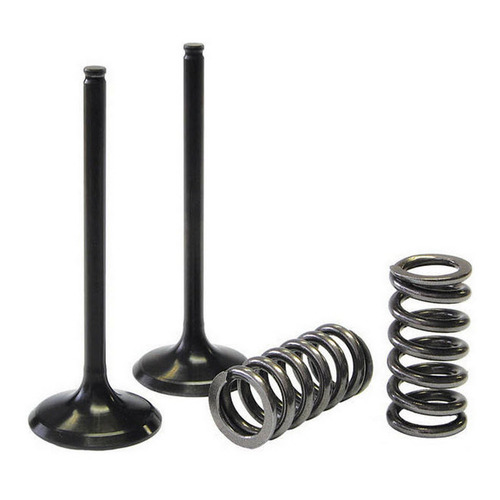
Valves and Springs
All parts work together to give you good engine performance. And valvetrains, in particular, are finely tuned systems. That means, if you change the type of valve you’re using, you must also consider the springs you use.
For example, if you replace titanium valves with steel valves (which is a common switch that many riders do), then you’ll have to consider the change in weight. Steel valves are heavier, and that added weight will require you to use different springs too. These often come in the replacement valve kits.

Some OEMs have supplied bikes with titanium valves from the factory. It's commmon to convert these valves to steel for longevity, but don't forget the springs must also be changed accordingly.
Valve spring seats, retainers, keepers, and seals
Just like any of your other components, you should also check the condition of the valve spring seats and the retainers. Most people reuse these components - and yes, that’s fine. You just have to make sure they're not worn. If they are, it's time to get yourself new ones.
As for the valve stem seals and keepers, it’s good to replace them too when doing a valve overhaul.
.jpg)
Be sure to inspect your retainers for damage and wear before reusing. It is common practice to use new keepers and valve seals.
After checking if all the components are good to go, let's move on to confirming whether the new valve spring free length is within the specs dictated in the manual, and whether the contact between the valve face and the valve seat is also within their required specifications.
When you measure the valve spring free length, this means that you're going to measure the valve spring's length in its uncompressed state. You should find the acceptable free length from your service manual. provided with the valve spring kit.
.jpg)
Before installing, measure valve spring free length and compare to what is recommended in your owners manual to ensure your valves will be operating and sealing properly.
You have to ensure that the valve and seat will seal well. What most people do is use a valve lapping tool together with a transfer fluid (you can use a permanent marker or a machinist's dye).
.jpg)
To test valve-to-seat contact, a permanent marker can be used to dye the valve seat.
Now that your valve seat is covered with marker or machinist's dye, you can insert your valve. Use a valve lapping tool to apply light pressure to the valve face and seat. After that, rotate the valve back and forth for a few seconds. Then, remove the valve carefully. The valve face should have the dye or marker that you’ve previously applied on the valve seat. With this contact pattern and width, you can now check if the valve and valve seat seal well.
It should show that the valve face is in complete contact with the valve seat. Measure the contact width with a caliper. Check that against the specifications indicated in the service manual.
.jpg)
A complete seal will leave a solid red line on the valve, while an incomplete seal will have patchy sections of red, or no red at all.
Problems with the contact continuity or contact width? This can happen when the valve seats have not been cut properly or if new valves are being installed into worn seats.
2. Installation
After you make sure that the new valves and components will result in a well-sealing combustion chamber, the hard part's over. We can move forward with the installation process. Since almost all modern valves feature some form of a thin coating or hardening process on their exterior faces, lapping valves using a lapping compound should never be considered due to the risk of wearing away the coated or hardened layer.
Pro tip: Prepare all components needed for installation by pairing and separating the new components based on their location since the intake and exhaust valves vary in diameter and mass. They use different springs, seals, seats, retainers, and keepers.
.jpg)
Be sure your valve components are re-assembled with oil or assembly lube where appropriate.
First, coat the valve spring seats with engine oil (or an assembly lube) and then proceed with installation. Secondly, install the new valve stem seals. As we mentioned, the intake and exhaust valve diameter may vary, so make sure that the correct seals are installed in the proper location. The next step is to apply drops of oil just below the notch in the valve stem. After applying the oil, install the valves by rotating them past their original seals in a gentle manner. Then, with engine oil, coat the valve springs and retainers lightly at their contact points, avoiding the area where the keepers reside. Position the keepers in the retainers, then put the springs and retainers in their appropriate locations on the cylinder head.
With the use of a valve spring compressor, you can compress the valve springs so that the keepers can be dropped into position.
Pro tip: If your keepers are being stubborn, you can use a pick to help guide the keepers into their position.
.jpg)
When re-installing keepers, use a valve spring compressor to allow you drop them into place, so they can find the proper position in the valve stem groove. A pick is often used to assist in positioning the keepers.
After placing your keepers in their notches in the valve stem, you can finally remove the valve spring compressor and the remaining valve assemblies can be compressed and completed.
After compressing the valve springs, use a brass punch and hammer to lightly hit the valve stem at the top a few times. This part is crucial since this will help ensure that the keepers you placed are seated correctly before you start the bike.
3. Post-Installation
This is the perfect time to check your valve clearances if they need to be re-shimmed. Anytime you install new valves, there’s a chance that you might need different shims.
During reassembly, you'd want to make sure that the cam timing is set according to what your service manual has mentioned. A mistimed engine is equal to a catastrophic disaster, and you wouldn't want that. Making sure you've done this step could help you save tons of unnecassary expense, so it’s best to triple check.
Pro tip: If you want to make sure the seal between the valve face and the valve seat are properly integrated, you can perform a leak-down test before the startup. If there are leaks, you can check where the leakage is coming from and how bad it is.
.jpg)
Checking valve clearance after installing new valves and springs is a must, because different sized shims will often be needed. Click here to see ProX's Shim Kits.
Are you planning to do a top end engine rebuild on your dirt bike? Check out our how-to guides:
** Source:
“How to Install Valves in a 4-Stroke Dirt Bike”, Pro-X Blog