(1).jpg)
How to Replace a Piston in a 4-Stroke Dirt Bike
Replacing your four-stroke piston on a dirt bike consists of these 4 Easy Steps:
- Disassembling
- Cleaning
- Preparation
- Reassembling
Disassembling Stage
Start by disassembling your head and cylinder by removing the following: seat, tank, exhaust system, and carburetor/throttle body. For better access to the engine, remove the sub-frame, shock, and air boot.
After removing all the major components, go ahead with removing the other components attached to the head or cylinder, such as spark plug boots, clutch cable guides, and electrical connections.
.jpg)
Removing the subframe, airboot, and shock, in addition to the other components, provides much better access to all sides of the motor. Don't forget to remove any cable guides or other items bolted to the head/cylinder.
Your next step would be to remove the cam cover. Loosen the bolts until they come loose. After you remove that, check that your camshafts are not compressing any of your valve springs before proceeding to loosen the cam caps. When done, you can now loosen and remove the cam chain tensioner. This is your chance to remove the timing chain completely. After all those, with caution and care, you can now lift your camshaft out.
Always handle these parts carefully. First, loosen the head bolts, remove the head and place it aside, then the cylinder bolts, and then the cylinder. While wiggling the cylinder off of the piston, hold the connecting rod steady.
Pro tip: Use a lint-free rag to cover the opening of the cases. This prevents loose parts or debris from falling inside the cases.
With a small screwdriver or a pick, you can finally remove one wire lock from the stock piston. You can do this by sliding the wrist pin out and removing the piston from the small end of the connecting rod.
Remember: Be careful not to drop anything inside the cases during this step, as well as the entire process.
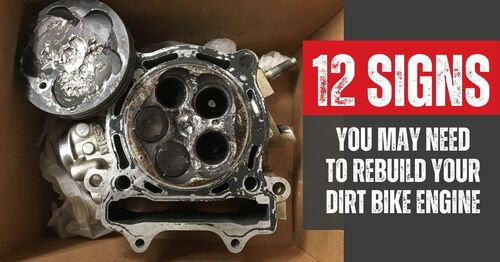
Cleaning Stage
Now that everything has been removed, you're going to want to clean any residue off your sealing surfaces and gasket. As well as the base for the cylinder on the cases, the top and bottom surfaces of the cylinder itself, and the bottom surface of the head that seals to the cylinder.
.jpg)
Scrape old gasket material off carefully, being cautious of any grooves or scratches in sealing surfaces and personal injury.
Pro tip: If there are big or difficult pieces of material you can't get rid of, you can use a razor blade to remove them. You have to make sure to be gentle and careful not to scratch the surfaces or cut deep grooves on them. And of course, try not to cut your finger off.
For the final round of cleaning, use a rag and a carb cleaner (or other similar chemical cleaners).
Preparation Stage
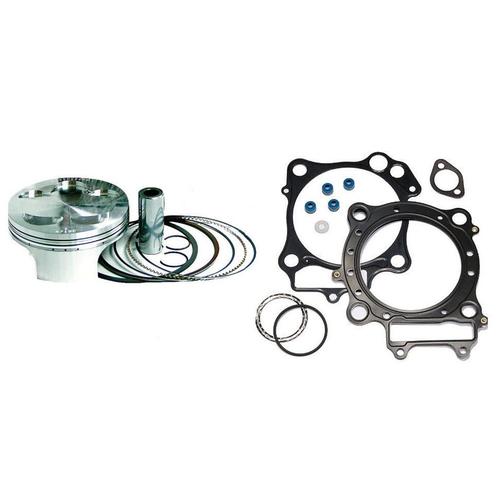
Before putting your cylinder back in with your new piston, you're going to want to examine the cylinder for any signs of wear and that it's within the required size and specifications.
(1).jpg)
Make sure your new piston is the correct size for your cylinder bore. Also ensure the cylinder is properly cleaned and honed, as pictured here.
Pro tip: Use a diamond-tipped honing brush for resurfacing work.
Reassembling Stage
Now that you've got your cylinder ready, this is the perfect time to double-check on your piston-to-wall clearance and ring end gap.
.jpg)
Double check your ring end gap.
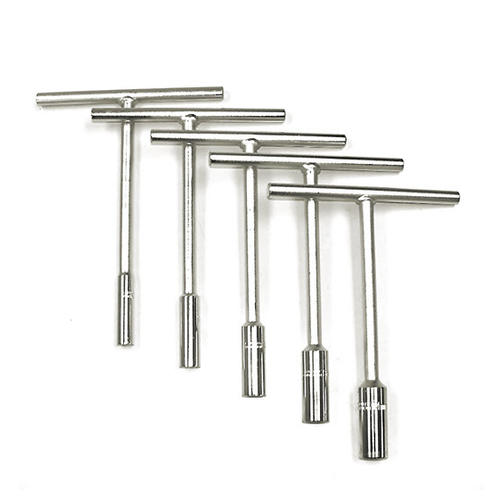
How to measure piston-to-wall:
- Measure your piston using a micrometer.
- Measure the piston on the skirt 90° from the wrist pin bore, at the point on the skirt that’s ¼ of the height of the piston from the bottom.
Pro tip: Refer to your service manual to find out the acceptable piston-to-wall clearance range.
How to measure ring end gap:
- Install the top ring and second ring approximately ¼" into the bore. Do it separately if applicable.
- Check the service manual for the required dimensions and use a feeler gauge to set the ring end gap within those dimensions.
- Most rings are pre-gapped, but always double check to avoid mistakes.
You may now proceed with installing the rings in the proper order (and location) on your piston. Always check the instructions that the piston kit came with to ensure that you're installing the rings correctly.
Using the usual motor oil you use in your four-stroke, use your finger to put a layer on the cylinder wall and outside your new piston (outside the rings, on the ring belt, and the skirts). This is to avoid your new piston and rings breaking in with dry conditions.
There are different methods in installing a piston. Just remember the most important thing - make sure your piston is facing the correct direction. The exhaust valve relief should line up with the exhaust side of the head. You also have to be cautious when sliding the piston into the cylinder. Ensure that the rings remain in their proper location.
With your new base gasket lined up on the cases, start installing the piston onto the connecting rod by lining the pin bore with the small end bore. Then start sliding your new and lubricated wrist pin completely in until you feel a resistance from the one wire lock you installed previously.
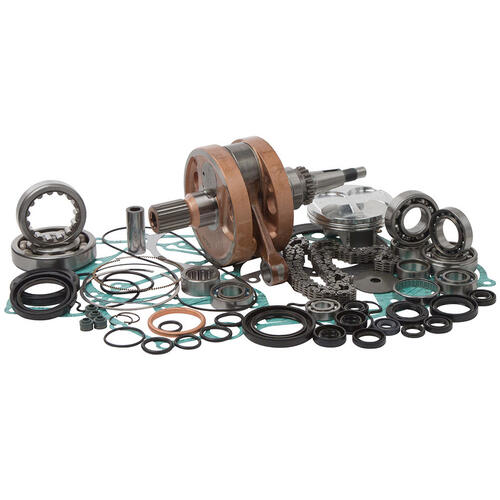
.jpg)
Before installing the new base gasket, piston and re-installing the cylinder, make sure the surface is clean and the crankcase is free of debris. While the top end is off, this could also be a good time to make sure your crankshaft is in spec.
Now that your piston is secured to the connecting rod through the wrist pin, install your remaining wire lock, making sure that it’s in the proper position. After that, you can slide the cylinder down to meet the cases.
You've reached the tricky part of reassembling. It's where you will install your rebuilt head with the proper head gasket, and reinstall all the stuff you previously removed. It's recommended to check your service manual for this to ensure that you're following the correct torque specs.
We also have helpful guides on rebuilding your 4-stroke head and installing new valves. Make sure to read those for a complete engine rebuild project.
** Source:
“How-To: 4-Stroke Piston Replacement”, Pro-X Blog